
Affiliate and campaign disclosure: Let’s Go SMALL is a Jotform affiliate and may earn a commission from qualifying purchases through our links. This original walkthrough was prepared for Jotform’s creator campaign, which offers an incentive for approved content. Approval and payment are not guaranteed. #JotformPartner
A service business needs a clear way to collect the customer’s request and move it toward a reply. Here we demonstrate the form-to-inbox path with three simple fields and entirely fictional data.
Jotform is officially available on the Wix App Market
You can install the Jotform app from the Wix App Market and use it to add forms directly to your Wix website. Find the official Jotform app on the Wix App Market.
The walkthrough below also documents the manual embed workaround recommended by Jotform Support when the app authorization failed in our setup.
What happened in our setup: the Jotform Wix app was installed, but its authorization callback repeatedly displayed “Something went wrong.” Jotform Support recommended embedding manually with Wix’s HTML element. This tutorial follows that workaround. It demonstrates a working Jotform embedded on Wix; it does not demonstrate a successful connection through the marketplace app.
Watch the two-minute walkthrough
This captioned, screenshot-based video has no audio. Every product screenshot comes from our actual demo.
Download the video · Open the published Wix demo
1. Create a form for one job
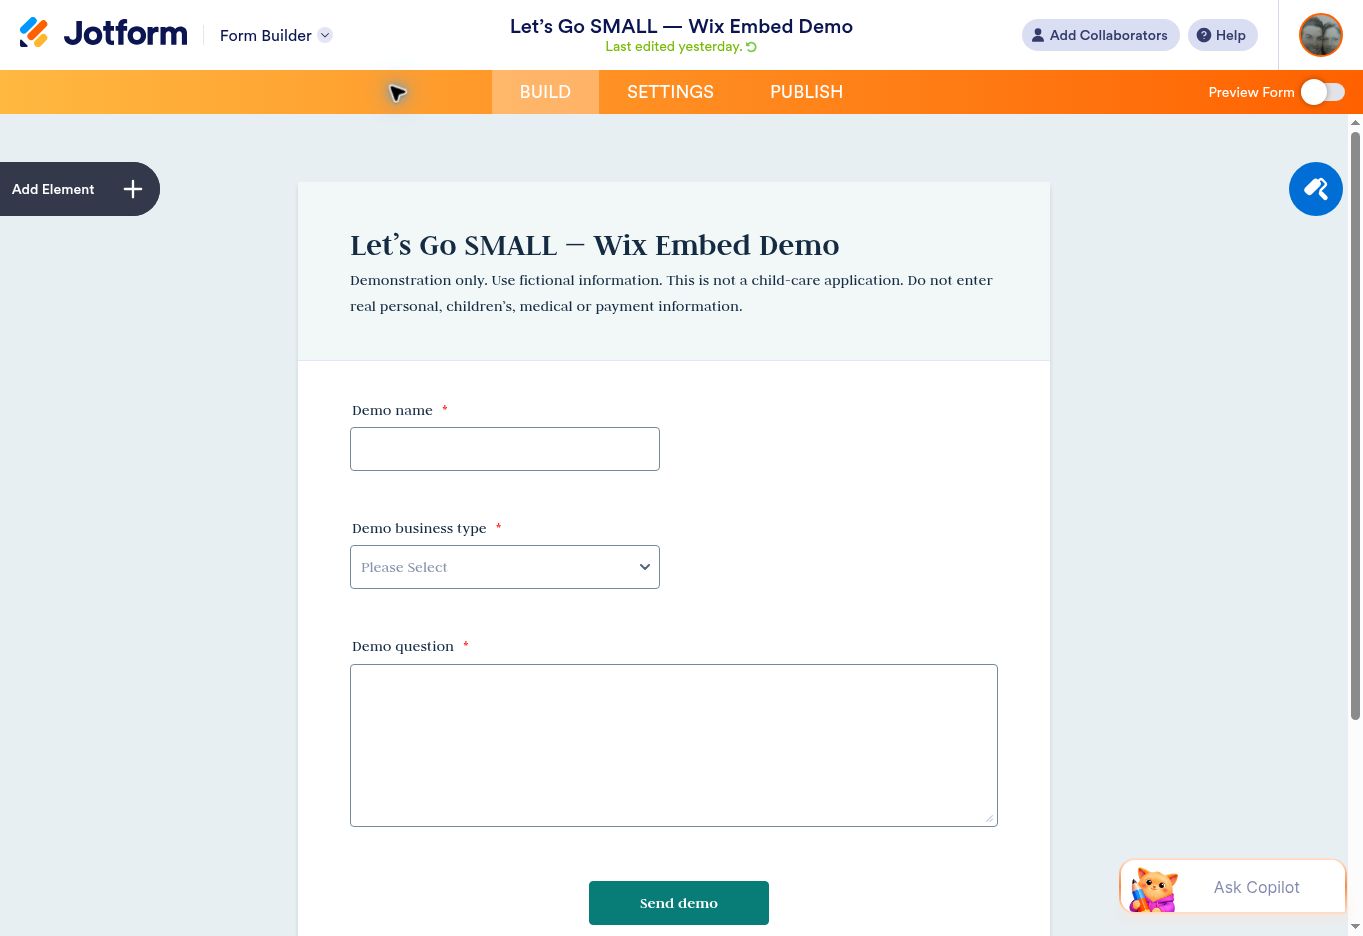
In Jotform, create a classic form and give it a clear title. Add a Short Text field for the demo name, a Dropdown for business type, and a Long Text field for the question. Make each required. Set the button to “Send demo” and the thank-you message to “Demo received!”
| Demo field | Purpose |
|---|---|
| Demo name | Identifies the fictional test. |
| Demo business type | Retail, Home services, or Other. |
| Demo question | Records the inquiry in the customer’s words. |
We intentionally omitted contact details from this public test. Before using a form for actual inquiries, add the contact method you need, appropriate privacy information, and a process for responding. Do not use this demonstration as a child-care application.
2. Get the iframe embed
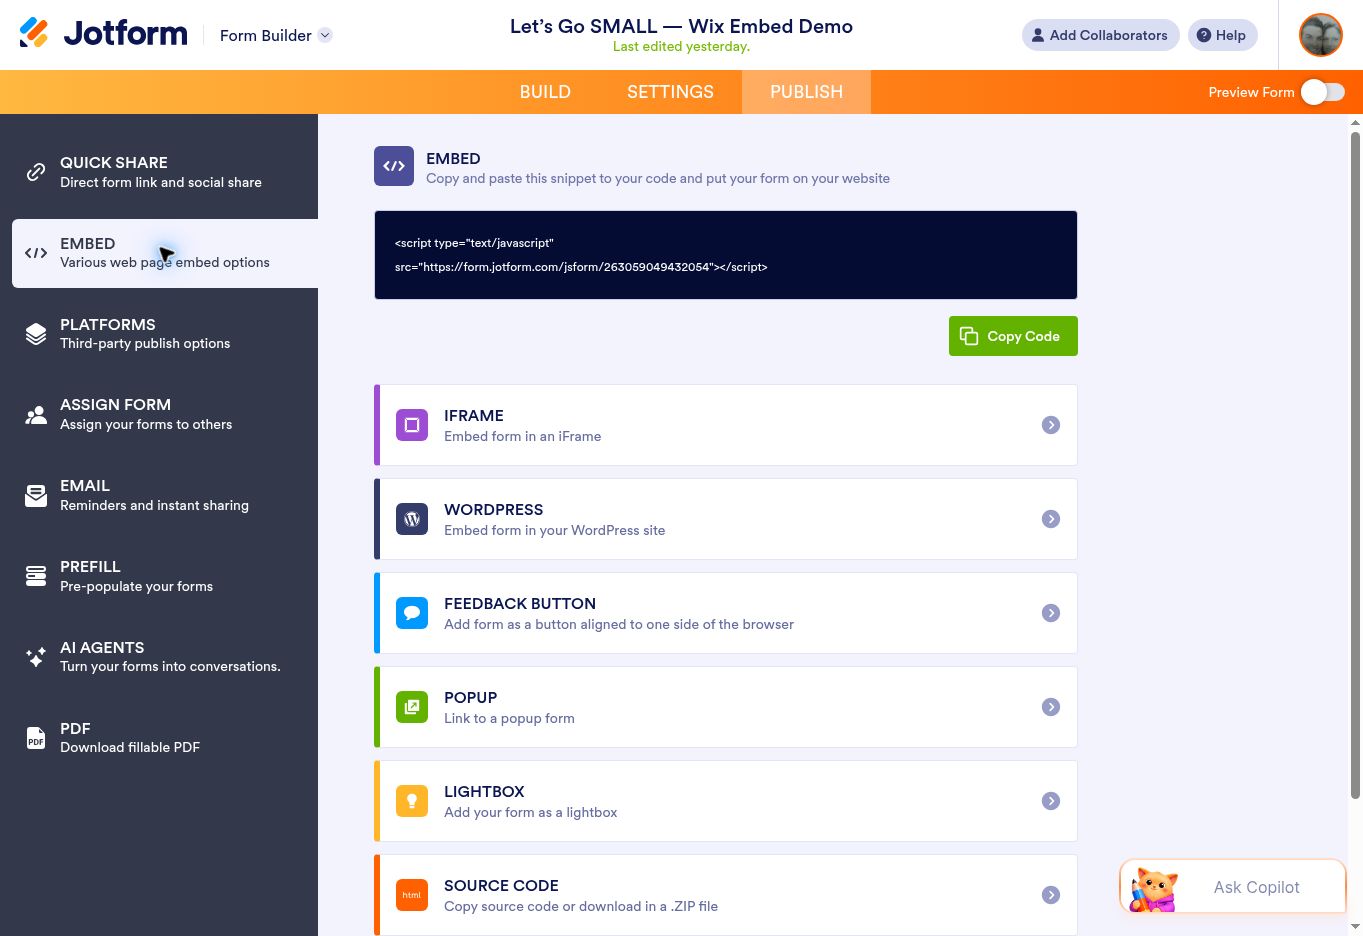
Open Publish → Embed → iFrame in Jotform. Use the code for your own form; each form has a different ID. The example below points to our fictional demo.
3. Add the HTML element in Wix
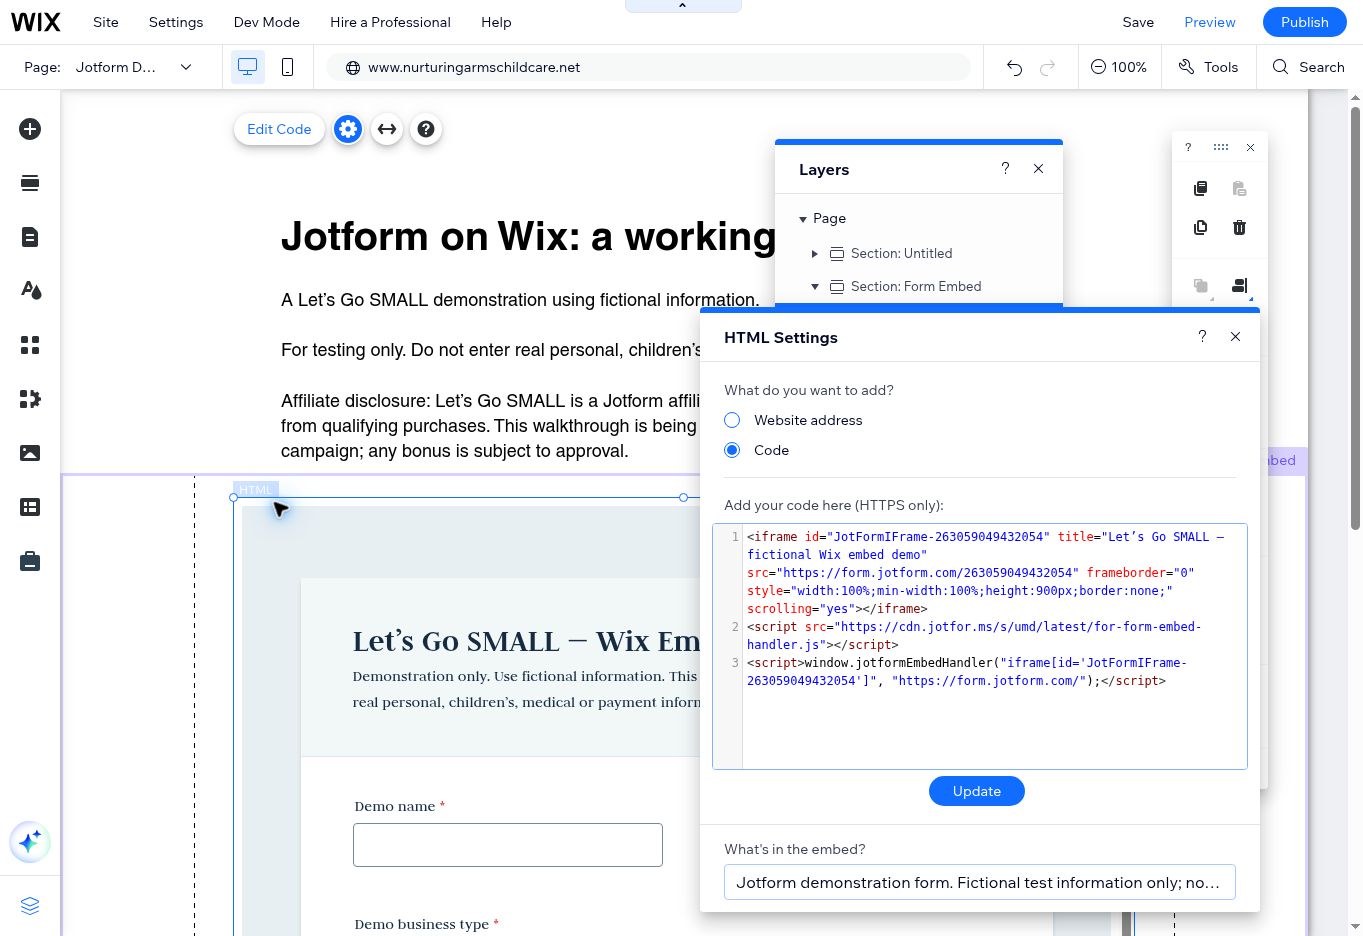
In the Wix Editor, open Add Elements (+) → Embed Code → Embed HTML. Select the HTML component, choose Edit Code, select Code, paste the embed, and choose Update. Editor labels can vary by version.
Here is the working demo code. For your site, replace the demo form ID in the iframe ID, source URL, and handler selector with your own form ID. Replace the title, too.
<iframe id="JotFormIFrame-263059049432054"
  title="Let’s Go SMALL — fictional Wix embed demo"
  src="https://form.jotform.com/263059049432054"
  frameborder="0"
  style="width:100%;min-width:100%;height:900px;border:none;"
  scrolling="yes"></iframe>
<script src="https://cdn.jotfor.ms/s/umd/latest/for-form-embed-handler.js"></script>
<script>window.jotformEmbedHandler("iframe[id='JotFormIFrame-263059049432054']", "https://form.jotform.com/");</script>
Our demo needs no camera, microphone, geolocation, or payment features, so the example omits those permissions. If your own form uses those features, configure the permissions it requires.
4. Size it, check mobile, and publish
Set the HTML element wide enough for the form and give its containing section enough height. Our desktop component is 900 pixels wide and 1,050 pixels high; the inner iframe starts at 900 pixels high with scrolling enabled. These are demo settings, not universal requirements. Check that visitors can reach every field and the submit button on desktop and mobile.
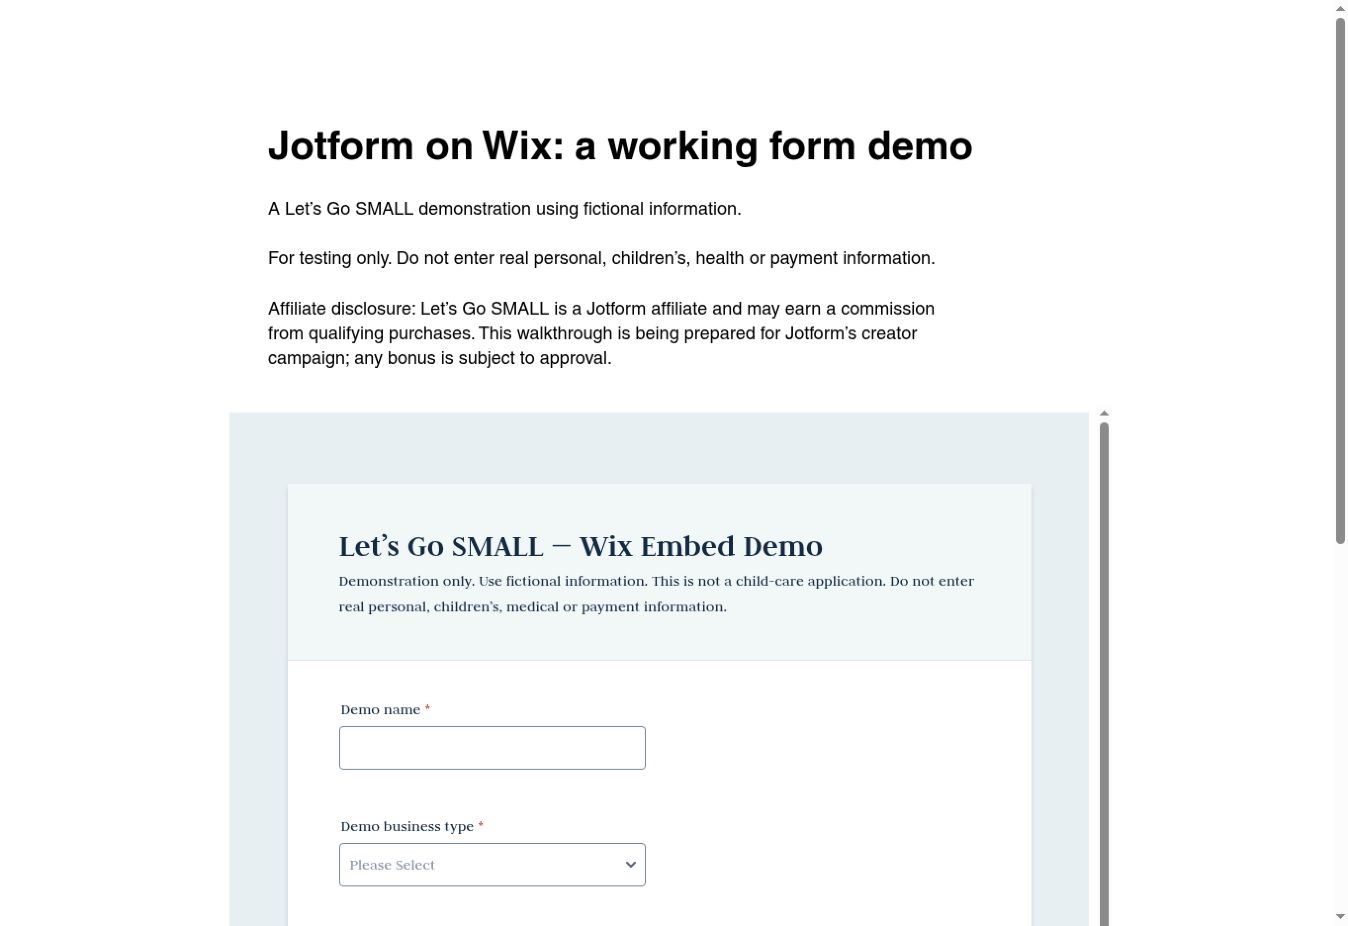
Choose Publish in Wix, then open the published page. The demo page is hidden from the site menu and marked noindex; anyone with its link can still open it. Hidden and noindex do not make a page private.
5. Test the published page
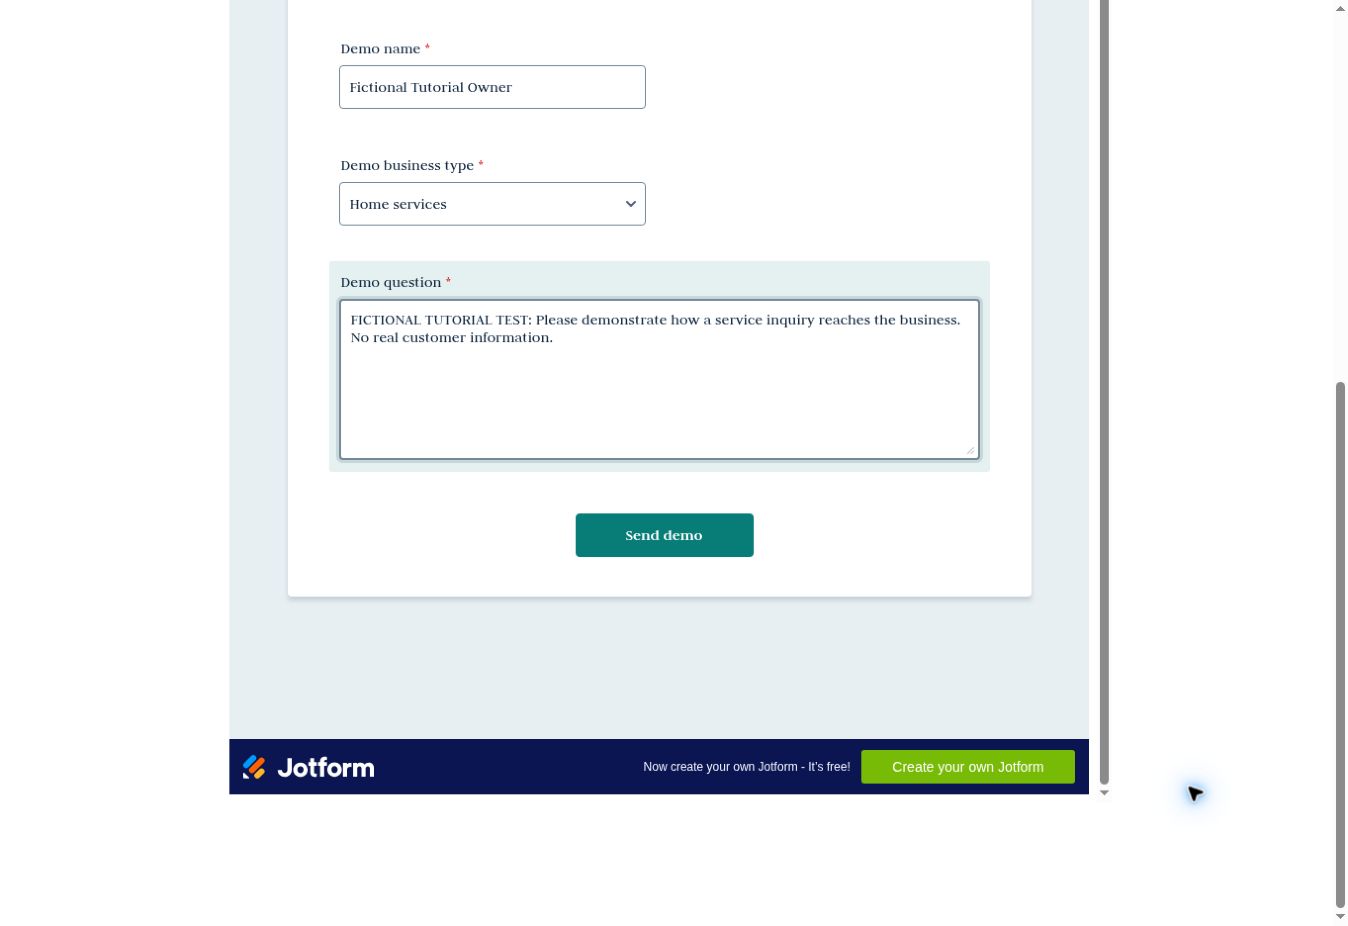
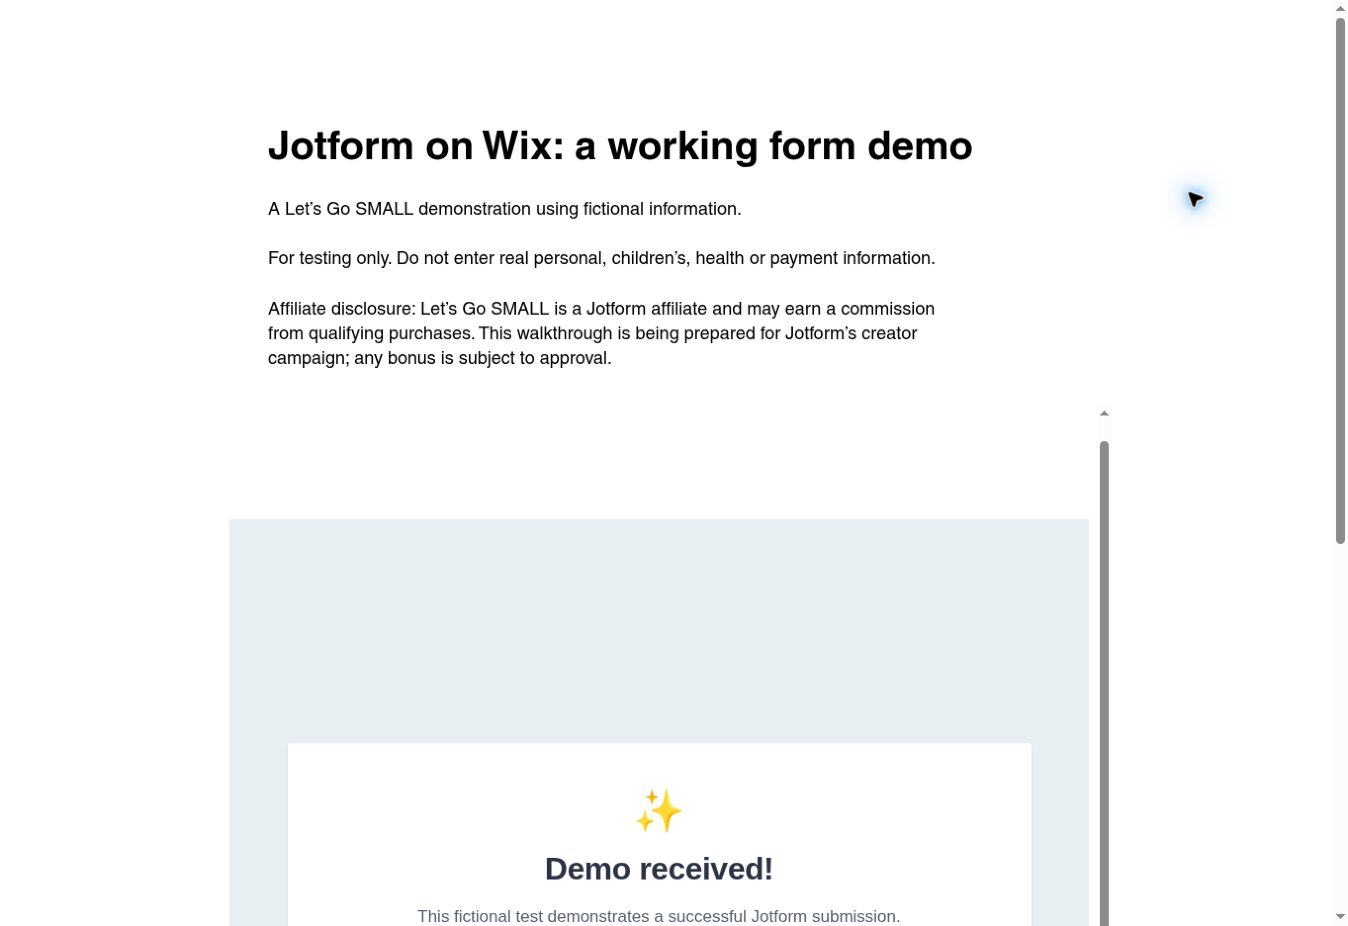
Use a unique fictional name so you can find the exact response later. We entered “Fictional Tutorial Owner,” selected “Home services,” and sent a question explicitly marked as a fictional tutorial test. Then we selected Send demo.
6. Verify the received response
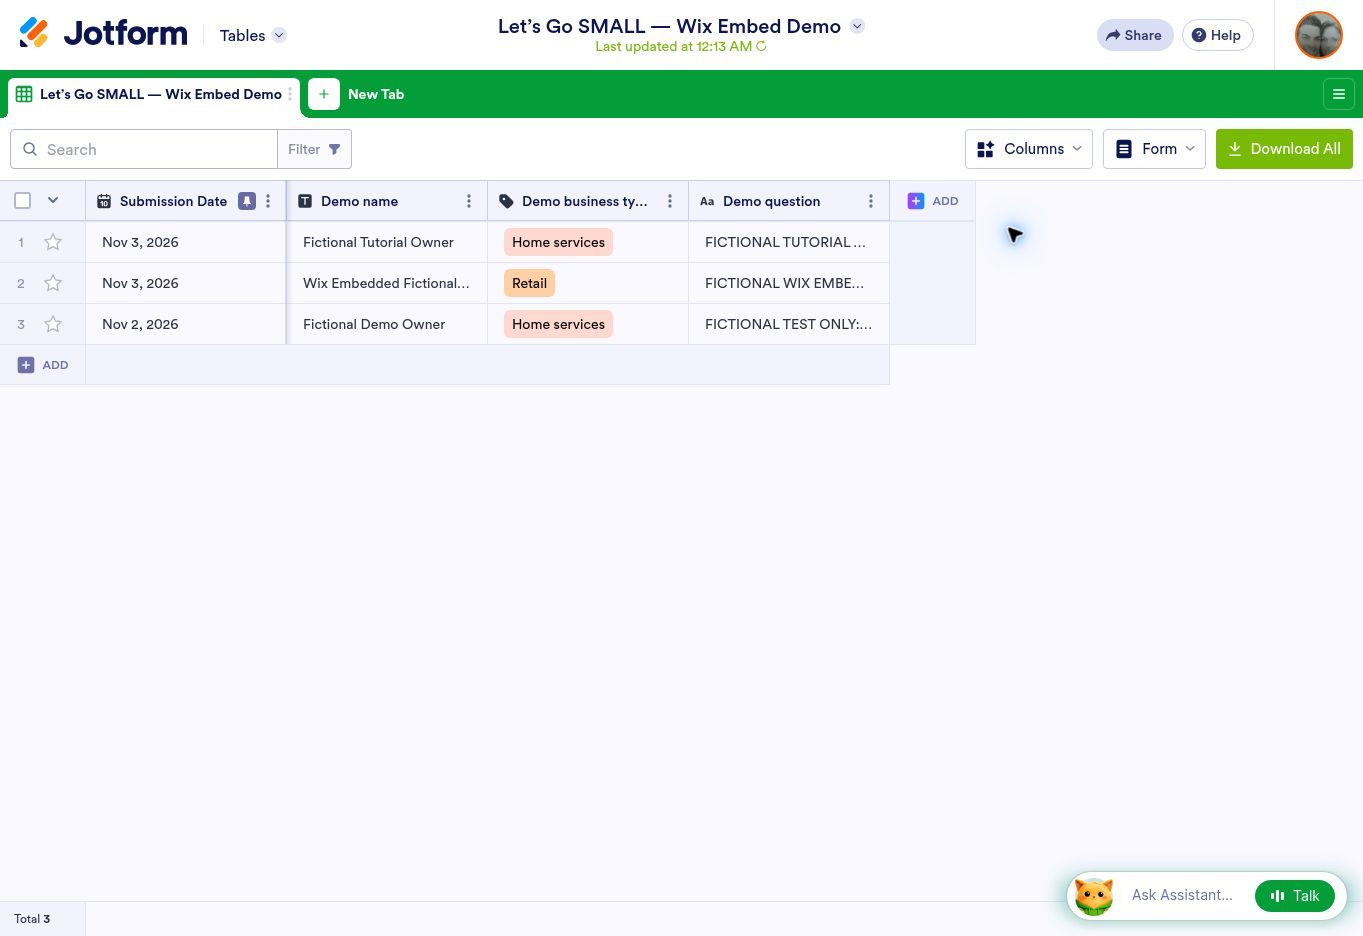
Open the form’s submissions or Jotform Tables. Find the unique fictional name and verify that the business type and question match. Our record appeared successfully. This confirms the published embed accepted the test and delivered it to Jotform.
If your test does not arrive
- Confirm you opened the published page after publishing your latest changes.
- Check that the iframe source points to the intended form and that the handler selector uses the same iframe ID.
- Make sure required fields can be reached and completed on mobile.
- Review the form’s submissions directly before relying on an email notification.
- If the app authorization fails, contact Jotform Support. A manual embed can be a practical alternative; it does not repair the app connection itself.
Ready to build your own?
Explore Jotform through our affiliate link. Let’s Go SMALL may earn a commission from qualifying purchases. Choose a plan based on your actual form and submission needs.
Read our customer inquiry form guide for the broader workflow.
Demonstrated and verified November 3, 2026. The Wix marketplace app authorization remained unresolved at publication. Creator campaign review is separate from form functionality. #JotformPartner